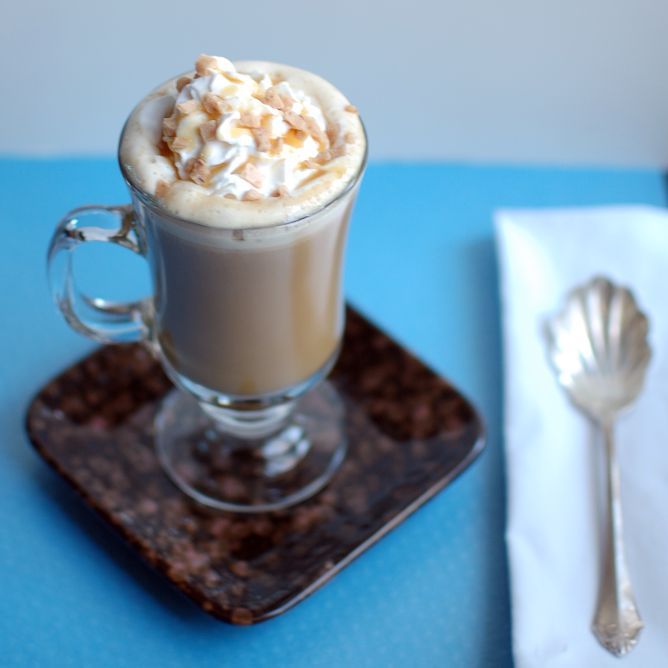
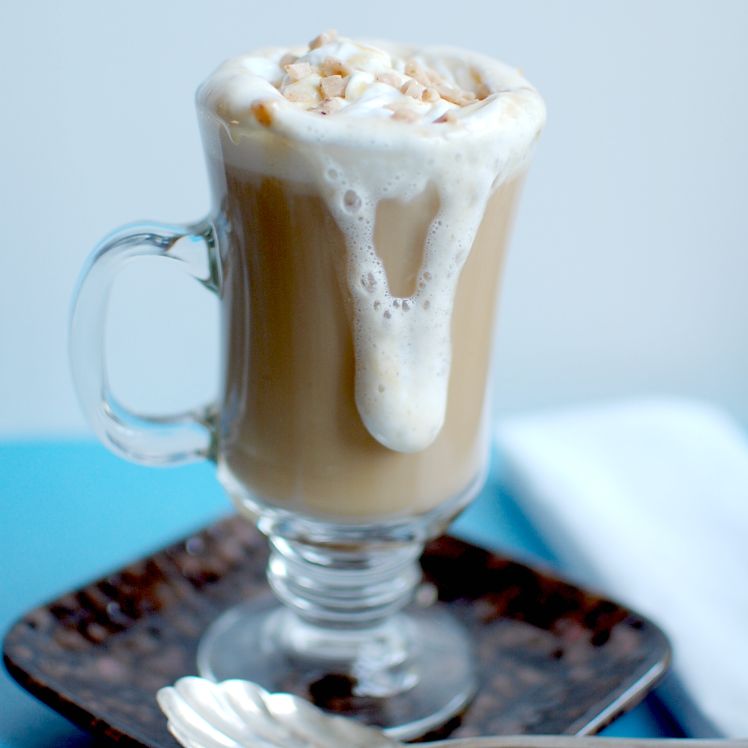
Toffee Caramel Coffee

The temperatures are finally starting to get cooler here, and to me that means cozy evenings snuggled up in a blanket with a good book and a nice warm drink.  I’ve been playing around with lots of new sweet beverages for my next cookbook (which will be ready by early December!), and I decided to share one of my favorites with my dear blog readers!  If you like this one, be sure to order one of my cookbooks when they are ready!

Toffee Caramel Coffee

  • 6 oz. hot coffee
  • 1 tbsp caramel ice cream syrup (or your favorite caramel sauce)
  • 1 tbsp toffee bits
  • whipped cream
  • caramel syrup for drizzling
  • toffee bits for sprinkling

Stir toffee bits into hot coffee and let sit for 1-2 minutes, stirring occasionally.  Strain to remove any remaining toffee pieces; pour into mug.  Stir 1 tbsp caramel syrup into coffee.  Top with whipped cream, a drizzle of caramel syrup, and a sprinkle of toffee bits.


Browned Butter Toffee Bars

I’ve sort of been on a browned butter kick lately.  It’s just so darn good!  I’m convinced that pretty much anything that is ‘good’ with butter in it would be absolutely fantabulous with browned butter in it…and I’m on a mission to find out!

I’ve made these bars a few times, but always just melted the butter and proceeded with the recipe.  This time I decided to let the butter brown before adding the other ingredients.  I can’t even begin to tell you how much better these are with the browned butter.  I’ll never go back to plain ol’ melted butter!  Oh, and by the way, this recipe is not at all healthy.  As a matter of fact, it’s down right dangerous.  Four sticks of butter go in here.  Four.  Sticks.  Seriously. 

Browned Butter Toffee Bars

  • 4 sticks butter
  • 2 cups graham cracker crumbs
  • 1 cup brown sugar
  • 2 (14 oz) cans sweetened condensed milk (did I mention this wasn’t healthy??)
  • 4 tbsp corn syrup
  • 2 tsp vanilla
  • 12 oz semisweet chocolate chips

Preheat oven to 350 degrees.  Line a 9×13 pan with foil; spray foil with cooking spray.  Set aside.  Place graham cracker crumbs in a medium bowl and set aside.

Melt butter in large saucepan over medium-low heat until it turns amber brown in color.  DO NOT LET IT BURN!  Pour one cup of browned butter into graham cracker crumbs.  Stir to combine and press into prepared pan.  Bake for 10 minutes.  Let cool while making toffee layer.

In pan with remaining browned butter, place brown sugar, sweetened condensed milk and corn syrup.  Bring mixture to a boil and boil for 5 minutes, stirring constantly.  Remove from heat and stir in vanilla.  Pour toffee mixture over crust.  Let set until cooled and firm.

Melt chocolate and spread over cooled toffee layer.  Let set until chocolate is firm (you can pop the pan in the fridge to speed up this process).  Cut into squares and serve. 


Sun-tella Spread (Sunflower Seed-Chocolate Spread)

Nutella.  It’s smooth, creamy, delicous.  It’s also kind pricey.  I wanted to try to make my own version.  So, I go to the grocery store only to discover that they don’t carry hazelnuts.  Seriously?  Change of plans.  What can I use in place of the hazelnuts that would still taste yummy.  On a whim, I decided to try sunflower seeds.  Yes.  Sunflower seeds.  The end result was yummy.  Not the same at Nutella, but  yummy none the less. I decided to go with salted sunflower seeds because I love that salty-sweet combination.  If you don’t want the salty-sweet combo, just use unsalted sunflower seeds.   I’m anxious to try other nuts/seeds for other flavors as well! 

 *NOTE* Because this is made with seeds, not nuts, those with nut allergies SHOULD be able to eat this.  But don’t just take my word for it.  Ask your doctor first if you’re not sure.

Sun-tella Spread

  • 1 cup sunflower seeds
  • 4 oz. semisweet chocolate chips, melted
  • 1/2 cup powdered sugar
  • 4-6 teaspoons vegetable oil

Place sunflower seeds in food processor and process until almost powdery.  (If you want a chunkier spread, don’t process quite as long).  Add enough vegetable oil to form a smooth, soft paste.  Pour in the melted chocolate, pulsing until smooth.  Add powdered sugar, pulsing until it forms a smooth, spreadable consistency.    

Store in airtight container.  Because there is no dairy in this spread, and because we’ll eat it up in about 3 days,  I just leave it at room temperature.  If you will be storing it for more than a few days, I’d refrigerate it and let it come to room temp before using.

Makes: 1 cup

WW Points + Per Tablespoon: 3

Skinny Brownie Batter Pancakes

After making the Brownie Batter No-Churn Ice Cream last week, I’ve had brownie batter on the brain.  Then, while browsing other food blogs, I discovered a recipe for brownie batter pancakes on Chocolate Covered Katie’s blog.  Oh yeah.  I adapted it just a bit – I used Splenda, added an extra tablespoon of cocoa powder, and used skim milk – and now I am in love.  It’s like eating brownies for breakfast!!  It doesn’t get much better than that.  Well, okay.  Yes.  It could get better.  Plop a big glob of sweetened whipped cream on top and it would *almost* be like having brownies and ice cream for breakfast.  But, we’ll leave the whipped cream off for today.  All that no-churn ice cream has plenty of cream in it.  I don’t need any more.  I can barely button my pants already. 

Instead of posting the recipe here, I’m simply linking to Katie’s blog (above).   I hope you enjoy this recipe as much as I do!

When made with my changes, the Weight Watchers points are as follows:

Serves: 1

Weight Watchers Points + : 4 points for the pancakes, add another 3 points for 2 Tbsp. of chocolate syrup

Brownie Batter No-Churn Ice Cream

I am not ashamed to tell you that I have been known to mix up a batch of brownie batter just to eat it with a spoon.  Well, I have never eaten the whole batch, but I can make a good dent in it before finally baking the rest of the batter.  I’ve had crazy thoughts of brownie batter running through my head lately…Brownie Batter Rice Crispy Treats (still need to make those).  Brownie Batter Pancakes (recipe coming soon!).  And Brownie Batter Ice Cream.  Obviously, my first creation was this ice cream.  And the best part?  You don’t even need an ice cream maker!  Sure, you could make it in one if you want…but I never feel like dragging out the machine for just the four of us.  So, here’s my version of Brownie Batter Ice Cream.  Smooth.  Creamy.  So rich, chocolately, and brownie-batter-y that you will get cavities just thinking about it!  Seriously.  Have a glass of milk nearby.  You’ll thank me.

Brownie Batter No-Churn Ice Cream

  • 2 cups heavy whipping cream
  • 1 can sweetened condensed milk
  • 2/3 cup dry brownie mix
  • 1 cup crumbled brownies, optional (I did not have any mix left to make brownies…but next time I will!)

In a medium bowl, combine 1 cup of heavy cream, sweetened condensed milk, and dry brownie mix. 

In a seperate bowl, whip remaining 1 cup of heavy cream until stiff peaks form.  Slowly add sweetened condensed milk mixture into whipped cream, while whisking.  Pour into a freezer safe airtight container.  Freeze for at least 6 hours, but overnight is best.  Scoop and serve!


Cookie Dough Stuffed Sweet Rolls

I try to eat healthy foods.  Lean meats and plenty of fruits and veggies.  But there are times when a person just needs to just high dive into a plate of sugary bliss.  This week was one of those times for me.  I went on a three day staff retreat with my coworkers and treated them (and myself!) to a high-calorie, sugar-laden, coma-inducing breakfast.  Eight pans of ooey-gooey sweet rolls.  But I didn’t settle for your everyday-run-of-the-mill-cinnamon-rolls.  No sir-ee bob.  I took it up a notch and created Cookie Dough Stuffed Sweet Rolls.  Well, actually, I made both.  Four pans of Cinnamon Rolls.  Four pans of Cookie Dough Stuffed Sweet Rolls.  The cookie dough version was scarfed up in no time flat.  Everyone loved them. 

They really aren’t the complicated to make, but they do take some time, so you’ll want to save these for a day when you have a few hours to spare – about three to four hours to be more specific. 

Cookie Dough Stuffed Sweet Rolls

  • 4 cups milk
  • 1 cup sugar
  • 1 cup oil
  • 9 cups all purpose flour
  • 2 packages (4-1/2 tsp) active dry yeast
  • 1 heaping tablespoon salt
  • 1 tsp baking soda
  • 1 heaping teaspoon baking powder
  • 1 stick butter. softened
  • 2 tsp vanilla
  • 1-1/2 to 2 cups brown sugar
  • 1 tsp salt
  • 1-1/2 cups chocolate chips
  • 1/2 cup chocolate chips, chopped

Frosting:

  • 1 pound powdered sugar
  • 1/2 cup brown sugar
  • 1/2 cup milk (or more to reach desired consistency
  • 1/4 melted butter
  • pinch salt

Mix the milk, oil and one cup of sugar in a large pan (I use a dutch oven).  Scald the mixture by heating it just to the point it starts to boil.  Turn off the heat and leave to cool for about 45 minutes, or until lukewarm.  Sprinkle the yeast over the milk mixture.  Let sit for a minute.  Add 8 cups of flour.  Stir mixture together until well combined.  Cover and let rise for one hour.

After one hour, add remaining one cup flour, baking powder, baking soda, and salt.  Stir together until combined.  Cover dough and refrigerate for at least an hour (this makes the dough easier to handle), or up to 2 days.

Divide dough in half.  Turn one half of dough onto a large floured surface and roll into a think rectangular shape.  This will be a BIG piece of dough!  Spread half a stick of butter onto dough (I use my hands for this).  Sprinkle on half of the brown sugar, salt, and chocolate chips.  Roll up the dough tightly.  Pinch seam to seal. 

Place 1 tbsp melted butter in each of 8 pie pans.  Cut rolls approximately 1 inch thick and lay in the buttered pans.  Repeat with remaining half of dough.  Let rolls rise for 20-30 minutes, and bake at 400 degrees for 15-28 minutes, or until golden brown.

While rolls are baking, prepare glaze by combining powdered sugar, brown sugar, salt and milk,  Add enough milk to make a glaze thin enough to pour.  Pour over warm rolls.  Sprinkle with chopped chocolate chips.  Serve warm or at room temperature.

You can let the rolls cool completely, wrap in plastic wrap and then in 2-3 layers of foil and freeze them for later use.  When ready to eat, simply thaw out, and pop in the oven to warm them up!

Chocolate Peanut Butter Cheesecake


Chocolate?  Yes.  Peanut Butter?  You betcha.  Cheesecake?  Absolutely.  Combine all three and you have a make-your-eyes-roll-back-in-your-head-good-cheesecake.  And that’s all I need to say about this cheesecake. 

Chocolate Peanut Butter Cheesecake

Crust:

  • 3-1/4 cup oreo cookie crumbs (or graham cracker crumbs if you wish)
  • 3/4 stick melted butter

Filling:

  • 2 pounds cream cheese (Four 8 oz. packages), softened
  • 1 cup peanut butter
  • 1-1/4 cup sugar
  • 1/2 cup heavy cream
  • 1 tsp vanilla
  • 5 eggs
  • 8 oz. melted semisweet chocolate


In medium bowl, combine cookie crumbs and melted butter.  Press into bottom and 1/3 of the way up the side of 10″ springform pan lined with parchment paper.

For filling, place softened cream cheese in mixer bowl and beat until smooth.  Add peanut butter and mix well.  Gradually beat in sugar.  Add heavy cream aned vanilla and beat on low speed to incorporate.  Add eggs one at a time.  Beat only until eggs are incorporated.  Transfer half of the mixture to a second bowl.  To one half of mixture, add melted chocolate.  Spoon both batters into crust, alternating between the peanut butter and chocolate mixtures.  When all batter is in pan, swirl gently with a knife.

Place pan in a larger pan and fill larger pan halfway with hot water.  Bake at 350 degrees for 60-75 minutes, or until lightly golden and set.  Let sit at room temperature for 1-2 hours.  Run paring knife around edge to loosen, and invert onto plate.  Invert again onto serving plate.

** I topped mine with ganache, a drizzle of peanut butter, and some chopped Reese Cups!

Gimme S’Mores Brownies

Chocolate.  Graham Cracker.  Marshmallows.  Oh my!  I have always loved S’mores.  They’re messy and gooey.  I  like messy and gooey.  We decided to turn the traditional campfire snack into brownies.  My almost 8 year old daughter made these all by herself, so I’m pretty sure anyone out there in blog land can do it too.  And, before you ask…No.  These brownies are most defnitely NOT Weight Watchers friendly!  But, hey, everyone is entitled to a treat every now and then.  And besides, we took these to a dinner…we didn’t just sit and eat the entire pan ourselves.  (Although I probably could have!)

Gimme S’Mores Brownies


  • 1-1/2 cups graham cracker crumbs
  • 6 tbsp butter, melted
  • 1 tbsp sugar
  • 1 brownie mix, plus ingredients to make brownies
  • 1 bag mini marshmallows


Line a 9×13 pan with foil and spray with cooking spray.

Combine graham cracker crumbs, butter and sugar and press into prepared pan.

Prepare brownie mix according to package directions and pour over crust.  Bake according to the brownie package.  Let brownies cool about 10 minutes.

Top the brownies with the marshmallows and place under the broiler just until the tops of the marshmallows are toasty brown.

Let cool slightly.  Serve warm or at room temperature.

My deepest apologies…and Chicken Mole` with Mango Salsa

First, I want to apologize for neglecting my blog yet AGAIN.  Summer time is always busy for me, with the kids being home from school…but I also switched jobs recently and that’s taken up a lot of my time lately…and, we gained a family member!  No, not another child…a dog!  So, needless to say, life got crazy and I haven’t been blogging.  I’m going to try to do better…but there may be times – like today – that I won’t have step by step photos, just the fnished product.  I hope you’ll hang in there with me until life settles down and I have more time to blog!

So, today’s recipe is one that a friend shared with me and I just tweaked a bit to our liking.  It is Chicken Mole` and it is D-Lish!  There’s a ‘secret’ ingredient in Chicken Mole` that you might be suprised about – cocoa powder.   My whole family loves this…even my picky children, although they only eat the chicken, not the Mango Salsa that tops the chicken.

If you’re one of my Weight Watcher friends…this is a great dish for you too!  It’s only 7 points per serving!

CHICKEN MOLE`

2 tbsp light brown sugar

1-1/2 tsp chili powder

1 tsp coco powder

1/4 tsp cumin

1/4 tsp pepper

1-1/4 tsp salt, divided

1-1/2 pounds chicken breasts, skinless & boneless (I used tenderloins)

2 limes

2 tsp honey

1 avocado, diced

1 mango, diced

3/4 cup grape tomatoes, quartered  OR 1 large tomato, diced

4 tsp chopped fresh cilantra


Preheat oven to 400 degrees.  Stir together brown sugar, chili powder, cocoa, cumin, and pepper.  Add 1/2 tsp salt.  Mix well and rub the mixture onto the chicken, coating well.  Bake until chicken is cooked through.

While the chicken is baking, prepare the Mango Salsa:

Grate zest from limes to equal 1 tbsp.  Whisk together honey, lime zest, and juice from both limes in a small bowl.  Add avocado, mango, tomato and cilantro, tossing to coat.

When chicken is cooked, place on serving plate and top with salsa.

An after dinner dessert drink…

This ain’t yo momma’s milkshake, baby.  No sirree.  This, my friends, is a Mudslide Shake.  And it just happens to be my husband’s favorite dessert treat.  Every once in a while, after we get the kidlets in bed and we have a minute to unwind, he’ll ask for a Mudslide Shake.  Usually I oblige and fix him one.  Occasionally I say I don’t feel like fixing one and he’ll whine for a bit, but finally give up and just hush.  However…one day last week was different.  He asked me to fix him a Mudslide Shake and I said, from my comfy seat on the couch, “No can do, buddy.  I’m exhausted.”  And much to my surprise he said “Well, tell me how to make it”.  After I picked my jaw up off the floor (you see, my hubs, though I love him dearly, isn’t much of a cook), I commenced to tell him how to make his beloved dessert drink.  Here’s what the next few minutes looked and sounded like.

HUBS:  What all do I need? 

ME:  Kahlua, Bailey’s, Vodka, Ice Cream and Chocolate Syrup.

HUBS:  Ok.

**I hear clanking and shuffling in the kitchen for a few seconds.**

HUBS:  Where do we keep the alcohol stuff?

ME:  Right there on the counter…over in the corner.

HUBS:  Oh, I see it.  OK.  How much of each?

ME:  You need one ounce of Kahlua, one ounce of Bailey’s, and half an ounce of Vodka.   Put that in the blender.

**More clanking around, as he gets the blender out of the cabinet.**

HUBS:  Wait…where’s something to measure it in?

ME:  *sigh*  The jigger is in the cabinet above the espresso machine.

HUBS:  OK…found it.  What was it again?

ME:  One ounce Kahlua, one ounce Bailey’s and half an ounce of Vodka.

HUBS:  Okay.

ME:  Now, add a big squeeze of chocolate syrup.

HUBS:  How much is a big squeeze?

ME:  I don’t know!  It’s not rocket science…just squeeze the bottle for 2 or 3 seconds.

HUBS:  OK.  Now what?

ME:  Add two big scoops of ice cream.

(Note – we had fudge ripple on hand…but you can also use regular ol’ vanilla)

HUBS:  OK.  Now what?

ME:  Put the lid on the blender and blend it.

HUBS:  Okey dokey. 

**Blender does it’s thing.**

HUBS:  Is that it?

ME:  That’s it.

HUBS:  That wasn’t so hard!

And that ends the epic story of how my hubs learned to make a Mudslide Shake.  In case you want the recipe without the play-by-play…here ya go.

MUDSLIDE SHAKE

  • 1 oz. Kahlua
  • 1 oz. Bailey’s Irish Cream
  • 1/2 oz. Vodka
  • Chocolate Syrup
  • 2 large scoops vanilla ice cream

Place Kahlua, Bailey’s and Vodka in blender.  Add a good squirt of chocolate syrup.  Add ice cream and blend until smooth.

To make the pretty chocolate swirl design on the glass…hold your glass at a 90 degree angle and gently squeeze in the chocolate syrup while turning the glass.  You can also just drizzle the sides of the glass with the syrup for a squigly design.