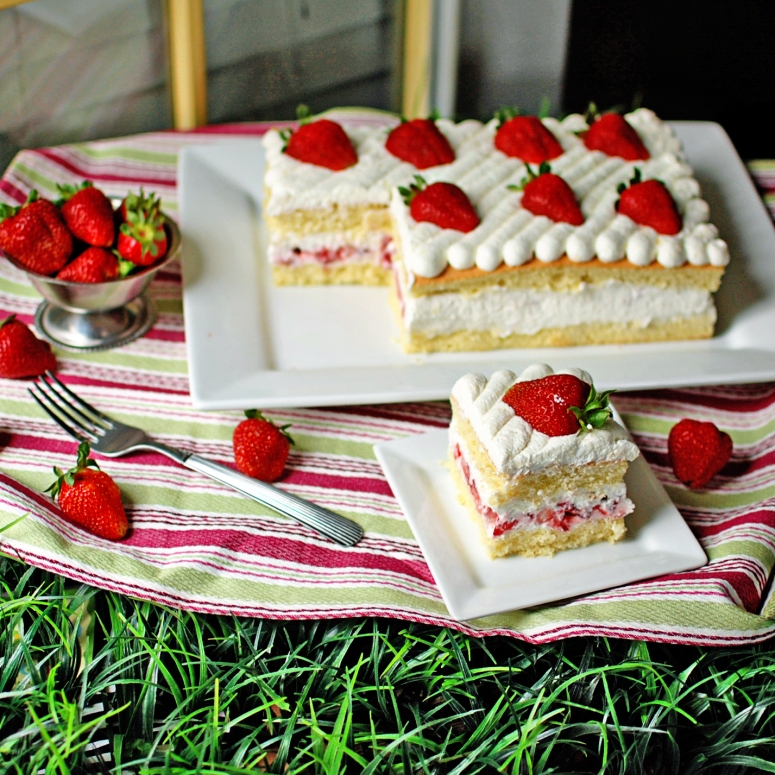
Skinnier Strawberry Shortcake

This ain’t your momma’s Strawberry Shortcake!  No sir.  This is Strawberry Shortcake elevated to a whole new level.  Fresh baked sponge cake.  Freshly whipped cream.  And berries picked from a local farm. 

I tried to come up with some fancy shmancy name to help emphasize the awesomeness of this cake, but there was nothing that described it better than the simple, traditional name. 
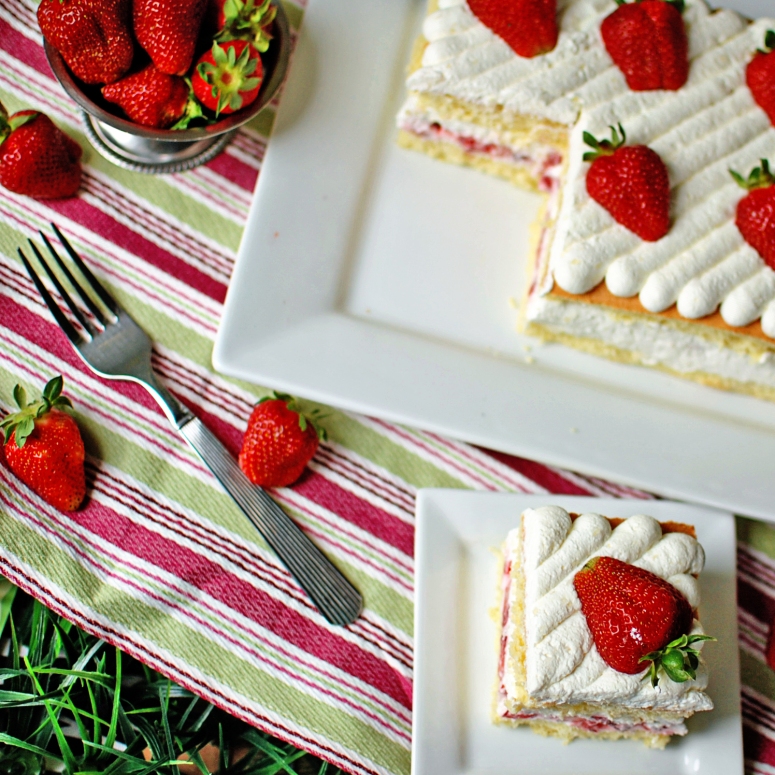
I lightened this up a bit by using Splenda in the whipped cream and to macerate the strawberries.  Yes, there’s still 2 cups of heavy cream in there, but hey – you’re not going to eat the whole thing, so don’t freak out.  I only ate 1/16 of this cake and was quite satisfied.  All in moderation, folks.

I think this will be my new favorite recipe for fresh strawberries.  But don’t quote me on that.  I have about 3 more gallons of strawberries, so I may find another favorite!

Skinnier Strawberry Shortcake

Cake

  • 4 eggs, seperated
  • 1/3 cup plus 2 tbsp sugar
  • 3 tbsp milk, at room temperature
  • 1/2 tsp vanilla
  • 3/4 cup flour
  • 1 tbsp corn starch
  • 2 tbsp butter, melted

Whipped Cream:

  • 2 cups heavy cream
  • 1/2 cup Splenda

Strawberries:

  • 1/2 pound fresh strawberries
  • 2-4 tbsp Splenda (depending on the sweetness of your berries)

Preheat oven to 350 degrees F.

To prepare cake, line an 8″ square baking pan with parchment or waxed paper.  Grease and flour the paper lined pan and set aside.

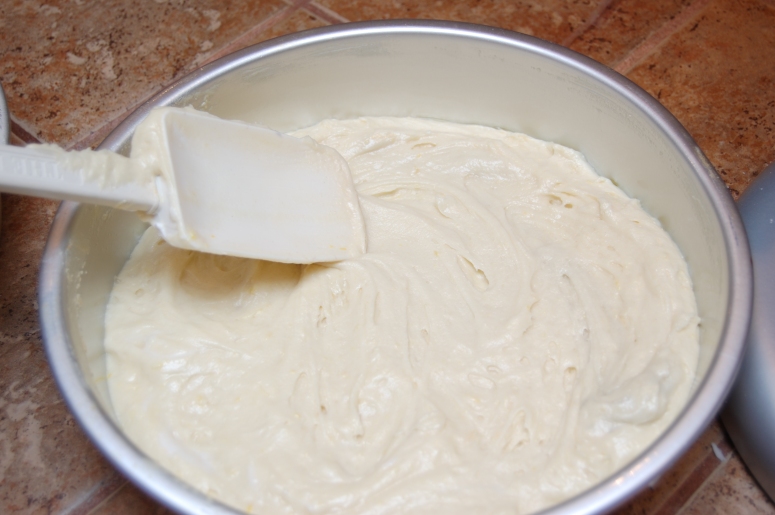
Combine sugar and egg whites in large bowl and whip to stiff peaks.  Add egg yolks and gently whisk until combined.  Add milk, vanilla, and flour and gently fold in until combined.  Fold in melted butter.

Pour cake batter into prepared pan and bake for 20-25 mintues or until a cake tester comes out clean.  Let cool completely on wire rack.  Remove cake from pan and split horizontally.

While the cake is baking, finely dice the strawberries.  Combine with Splenda and set aside to macerate until ready to assemble cake.

When cake is cooled and ready to be assembled, prepare the whipped cream:  Combine heavy cream, splenda, and vanilla in a metal bowl and beat until slightly stiff.  Reserve one cup for piping on the top of the cake.

Place one cake layer on a serving platter.  Top with half the the remaining whipped cream.  Spread a layer of strawberries over the whipped cream.  Top with the other half of the whipped cream.  Place the remaining cake layer on top.  Spoon the reserved 1 cup of whipped cream into a piping bag fitted with a large round tip, and pipe diagonal stripes over the entire top of cake.  Garnish with fresh strawberry halves, if desired.

Paw Paw Muffins

About a week ago, I went to a friend’s house to pick up something I had ordered from her.  When I stepped on her porch I could smell this really sweet, fruity scent.  When she opened the door the first thing I said was “what smells SO GOOD out here???”  It smelled absolutely divine.  I can’t even describe it.  She informed me that it was Paw Paw fruit from her Paw Paw tree.  Seriously?  I had only heard of them from The Jungle Book movie!  Is there really such a thing?  Yes, there really is.  She gave me a bag of them to take home and try.  She told me that they are an ‘acquired taste’ for most people, so don’t be alarmed if you take a bite and don’t really like it at first.  So, I took my little bag of Paw Paws home and was anxious to taste one and make something with them. 

First, I just cut one open, and ate a bit of the flesh with a spo0n.  Hmm…she’s right.  I didn’t love it.  But I didn’t hate it either.  I couldn’t decide.  So, I made muffins with a few.  I did like the muffins better than the plain paw paw, but I still didn’t love it.  My husband really liked the muffins though.  Here’s the recipe, in case you ever come across some Paw Paw fruit yourself!

Paw Paw Muffins

  • 1/2 cup whole wheat flour
  • 1/2 tsp baking powder
  • 1/4 tsp baking soda
  • 1/8 tsp salt
  • 3 medium-large paw paws (or 4 small ones), flesh removed
  • 1/4 cup brown sugar
  • 3 tbsp butter, melted
  • 3/4 tsp vanilla
  • 1 egg yolk
  • 1/4 cup walnuts

Combine flour, baking powder, baking soda and salt.

In seperate bowl, combine paw paw flesh, brown sugar, butter, vanilla, and egg yolk.  Stir just until mixed together.  Add dry ingredients and walnuts to paw paw mixture, stirring just until combined.  Don’t overmix.

Divide evenly into 5 or 6 muffin cups (grease the muffin cups or use papers).  Bake at 350 for 15-18 minutes, or until a tester inserted comes out clean.  Cool slightly before serving.

Birthday Cake Batter No-Churn Ice Cream

After making the Birthday Cake Batter Rice Crispy Treats, my sprinkle-obsessed daughter has been begging me to make Birthday Cake Batter Ice Cream – her absolute favorite ice cream.  So, while I was in my ice cream-making mode last week, I whipped up a batch.  She was in heaven.  If you’re a birthday cake ice cream lover like her, I think you will be too.

Birthday Cake Batter No-Churn Ice Cream

  • 2 cups heavy cream, divided
  • 1 can sweetened condensed milk
  • 2/3 cup dry yellow cake mix
  • 1 tbsp butter flavor
  • 1/3 cup sprinkles

In medium bowl, whip 1 cup of heavy cream to stiff peaks. 

In seperate bowl, stir together remaining 1 cup of heavy cream, sweetened condensed milk, cake mix, and butter flavor.  Fold whipped cream into this mixture.  Fold in sprinkles.  Pour into a freezer safe airtight container and freeze until solid.

Skinny Brown Butter Peach Crumble Bars

Peaches have been absolutely delicious this year.  We’ve been buying them from a local fruit stand regularly for the last several weeks.  I don’t know if I’ve ever had peaches as good as the ones we’ve been getting this year.   In addition to just breaking them open and eating them as the juice runs down my arms to my elbows,  I’ve been trying to come up with different ways to use them.  I found this idea of a cross between a granola bar and a peach cobbler.   I’ll be trying these with other fruits too…let me know if you do!

Skinny Brown Butter Peach Crumble Bars

  • 1-1/2 cups oats
  • 3/4 cup whole wheat flour (or you can substitute all purpose flour)
  • 6 tbsp brown sugar
  • 6 tbsp splenda
  • 1/4 tsp salt
  • 1 tsp cinnamon
  • 1 tsp vanilla
  • 1 stick light butter, melted
  • 4 ripe peaches, peeled and chopped (about 2 cups)

Preheat oven to 350 degrees.  Butter and flour an 8×8 inch pan.

In a large bowl, combine flour, sugar, splenda, oats, cinnamon and salt.  Set aside. 

In a small saucepan over medium-low heat, melt the butter.  Stir constantly until the butter turns a light golden brown. (This will take about 3 minutes or so)  Once brown, add butter to flour mixture along with vanilla.  Stir until combined.  Fold in the peaches.  Press into prepared pan and bake for 25-30 minutes.

Let cool completely and cut.

Serves: 12

Weight Watchers Points + : 4 points each

Chocolate Peanut Butter Cheesecake


Chocolate?  Yes.  Peanut Butter?  You betcha.  Cheesecake?  Absolutely.  Combine all three and you have a make-your-eyes-roll-back-in-your-head-good-cheesecake.  And that’s all I need to say about this cheesecake. 

Chocolate Peanut Butter Cheesecake

Crust:

  • 3-1/4 cup oreo cookie crumbs (or graham cracker crumbs if you wish)
  • 3/4 stick melted butter

Filling:

  • 2 pounds cream cheese (Four 8 oz. packages), softened
  • 1 cup peanut butter
  • 1-1/4 cup sugar
  • 1/2 cup heavy cream
  • 1 tsp vanilla
  • 5 eggs
  • 8 oz. melted semisweet chocolate


In medium bowl, combine cookie crumbs and melted butter.  Press into bottom and 1/3 of the way up the side of 10″ springform pan lined with parchment paper.

For filling, place softened cream cheese in mixer bowl and beat until smooth.  Add peanut butter and mix well.  Gradually beat in sugar.  Add heavy cream aned vanilla and beat on low speed to incorporate.  Add eggs one at a time.  Beat only until eggs are incorporated.  Transfer half of the mixture to a second bowl.  To one half of mixture, add melted chocolate.  Spoon both batters into crust, alternating between the peanut butter and chocolate mixtures.  When all batter is in pan, swirl gently with a knife.

Place pan in a larger pan and fill larger pan halfway with hot water.  Bake at 350 degrees for 60-75 minutes, or until lightly golden and set.  Let sit at room temperature for 1-2 hours.  Run paring knife around edge to loosen, and invert onto plate.  Invert again onto serving plate.

** I topped mine with ganache, a drizzle of peanut butter, and some chopped Reese Cups!

Skinny Raspberry Crumb Coffee Cake

Serve this yummy treat as breakfast, dessert, or a snack!  And substitue other fruits for a twist!

Skinny Raspberry Crumb Coffee Cake

  • 3/4 cup lowfat buttermilk
  • 1/4 cup unsweetened applesauce
  • 1/2 cup sugar
  • 1 egg
  • 1 egg white
  • 1-1/2 cups flour
  • 1 tsp baking powder
  • 3/4 tsp baking soda
  • 3 tbsp butter
  • 1 cup fresh or frozen raspberries

Topping:

  • 1/3 cup flour
  • 2 Tbsp brown sugar
  • 2 Tbsp sugar
  • 2 Tbsp butter, melted


Preheat oven to 350 degrees and spray a 9″ square pan with cooking spray.  In a medium bowl, whisk together buttermilk, applesauce, sugar, egg and egg white.  In food processor, combine flour, baking powder and baking soda.  Add butter and pulse until crumbly.  (Alternately, you can cut in the butter by hand)  Place crumbly mixture in large bowl.  Add wet ingredients to dry ingredients.  Fold in raspberries and spread batter in prepared pan.

For topping, combine flour and sugars.  Stir in melted butter.  Sprinkle evenly over top of cake batter.  Bake for 25-30 minutes, ur until a toothpick  inserted in the center comes out clean.  Serve warm or at room temperature.


Cupcake Hero {September}

This month’s secret ingredient for Cupcake Hero is…..

CAFFEINE!

How fun is that?!?!  I had several ideas for what I could do with this, but so far I’ve only created one cupcake.  A spin-off of my absolute favorite espresso drink:  The Caramel Latte.  I developed a Caramel Latte Cupcake, and everyone who tried it LOVED it!  I used to work at a local coffee shop, and we would top the Caramel Lattes with whipped cream and a drizzle of caramel on top.  So, I mimicked that with the frosting and a caramel drizzle. 

It is a Caramel-Espresso flavored cupcake, with a rich, thick caramel filling, topped with Espresso-laced Buttercream and drizzled with more of that luscious caramel filling.

My mouth is watering just thinking about these again!


CARAMEL-ESPRESSO CAKE RECIPE:

1 white cake mix*

1 cup flour

1 cup sugar

1 tbsp instant espresso powder

1/2 cup caramel coffee creamer

1/2 cup very strong espresso

1/3 cup oil

3 eggs

1 cup sour cream

1/3 cup Dulce De Leche**

Mix cake mix, flour, sugar and espresso powder together in mixer bowl.  Add coffee creamer, espresso and oil; mix well.  Add eggs one at a time, beating after each addition to incorporate egg.  Add sour cream, beating well.  Add Dulce De Leche, beating until smooth.

Scoop into muffin tins lines with cupcake papers, filling tins 2/3 full.

Bake at 350 until cupcakes test done.  Let cool 5 minutes, remove from tins to wire racks and let cool completely.

Once cooled, cut a hole out of the center of each cupcake.  Fill each cupcake with Dulce De Leche.

*You can use your favorite scratch recipe if you’d like…but honestly, I like using a mix because it turns out perfect every time.

**You can find Dulce De Leche in the Latin food aisle of your grocery store.
ESPRESSO-LACED BUTTERCREAM:

Basic Buttercream (Use your favorite recipe)

1/4 cup strong espresso

2 tbsp finely ground instant espresso powder

Powdered sugar, if needed
Prepare your favorite buttercream.  Add strong espresso, mixing well.  Add powdered sugar, if needed, to reach desired consistency.  Stir in instand espresso powder.

Pipe swirls of Espresso-Laced Buttercream on top of each cupcake.

Place some Dulce De Leche in a piping bag and snip off the end.  Pipe zig-zag designs on the top of each cupcake.

Cupcake Hero

That’s me.  Well, I’m hoping it’s me, anyway.  Saturday I was searching for a cake recipe online and stumbled across a blog called I Heart Cuppycakes.  I instantly knew I’d like it just from the name.  I browsed around and discovered that I Heart Cuppycakes hosts a Cupcake Hero contest each month…basically the cupcake version of a throwdown in blogworld.  I knew immediately that I wanted to participate!  

Each month a new ingredient is announced and we must make a cupcake focusing on that ingredient.  August’s ingredients is…………one of my favorite berries…………RASPBERRY!!!  I was super excited.  But the deadline to enter was today, Monday.  And it was Saturday!  So, what did I do?  The only thing I could do.  I went to the store, bought what I needed and spent Sunday afternoon baking, filling and frosting cupcakes.  Then, photographing my cupcakes, uploading the pics and emailing the host.  I certainly didn’t want to miss the deadline!   Voting/Judging is this week, and then the winner will be announced in a couple weeks.  Check out Cupcakes & Other Culinary Creations in a couple days to see all the entries.

Here’s the cupcake I made – a Raspberry-Lemon Swirl Cupcake with Mascarpone Filling.


I added a fresh raspberry in with the filling…a nice surprise, and it looks so cool when you cut the cupcake!

Lemon Berry Mascarpone Cake

For those of you who don’t know, I work at the local coffee shop.  Well, once upon a time, we had this amazingly awesome cake that we bought frozen and sold by the slice.  Did I mention it was awesome?  I may or may not have had a slice of this decadent cake for lunch once.  Okay, twice.   But seriously, people…this cake was that.  good.

I needed to recreate this cake so that I could have it anytime I wanted.  I went home, went to my kitchen and started playing…er…baking.  After a few tries, it was perfect. 

And, because it’s spring, because in the spring I love all things lemon and/or berry, because it’s 11:27 pm on Monday night, and because I absolutely love my blog readers, I’ve deciced to share this fantabulous creation with you!

There’s three parts to this cake.  The cake itself, the crumb topping, and the mascarpone filling.   Start by making the crumb topping.

Combine one cup flour, 2/3 cup sugar, the zest of one lemon and 6 tbsp of melted butter.

Grab a fork and stir this mixture around until it forms a crumbly, delicious mess.

Resist the temptation to eat this with a spoon.  Set the crumbly-ness to the side.

Now, let’s move on the to cake portion.  Preheat your oven to 350 degrees.  Butter two 8″ cake pans. 

 In a small bowl, sift together 2 cups flour, 1 tsp baking powder and 1 tsp baking soda.

In mixer bowl, cream 1 stick of softened butter and the zest of one lemon.  Add 1 cup sugar and mix well.  Add 3 eggs, one at a time, beating after each addition.  Add the juice of one lemon.

Add dry ingredients, alternately with 3/4 cup sour cream.  So, add 1/3 of the flour mixutre, 1/4 of the sour cream, etc.

Beat until well combined.

Divide batter between prepared cake pans.

Grab a bag of frozen mixed berries and sprinkle generously over the top of each cake – use about 1/2 to 3/4 cup per cake. 

Now, remember that crumbly bowl of heaven from before?  Divid that between the two pans.

Press down genlty and place cakes in the oven.  Bake for 30-45 minutes, or until cake tester (or toothpick) inserted in the middle comes out clean.  Let cake cool completely in pans.

When you’re ready to assemble, prepare your filling.

Beat together 12 oz. mascarpone cheese, 1/4 cup half & half, and 4 tbsp powdered sugar.

Place one cake layer on your serving plate, crumb side up, and spread all the filling on top. 

Top with second cake layer, crumb side up,  and dust with powdered sugar.

Refrigerate the cake until the filling is nice and firm…a few hours at least.  Serve cold or at room temperature, but store leftovers in the refrigerator.

This will keep for 3-4 days in the refrigerator (not around here, though…I’d eat it faster than that!), or you can wrap it well and freeze it.

Rach’s Cakes Challenge

Over at Rach’s Cakes, this month’s challenge was “Halloween”.  I made a cake for one of my husband’s coworkers this week, so that’s my submission.  It is a carrot cake with cream cheese decorator’s icing.  Piped pumpkins adorn the top.

stuff 163

And I thought I’d also share another pumpkin cake I’ve made in the past.  This one was actually for a baby shower, but it would be great for a Halloween or Thanksgiving cake too, minus the baby on top!
BabyPumpkin


Rach decided to take a ‘hiatus’ on the challenges until January, but I can’t wait till the next one!